FOOT PRINT IMPRESSION CLIPS CLICK HERE
Footprints and shoe prints left on a carpet or floor are more difficult to record. If the prints are hard to photograph forensic scientists will try to lift them.To do this, there are several different devices that can be used. On hard floors, officers use gel – a sheet of tacky material that picks up the pattern in the dust or dirt. If there are prints left on documents or paper, investigators use an electrostatic lifter. This is a foil sheet coated in black plastic connected to a device that generates a highly static electric charge. The static charge draws the dust from the print on the black plastic, where it is seen more easily.


FOOT PRINT IMPRESSION lesson
- Chose a partner and collect the materials that are listed below.
- Put soil into a container so that it covers the base and has a level surface. Add some water to bring the soil to the desired consistency. Remember – the soil must be soft enough to allow you to impress your shoe or boot print into it, but firm enough to hold the shape of the impression once you remove your foot.
- Decide on whether you will create a boot or foot print, and then stand in the container to create a print in the soil. Place your foot straight down, and lift it straight up to give the clearest print. If you are happy with the print you have made in the soil you can take a picture for evidence. If not, smooth the soil, add some more water, and repeat the process.
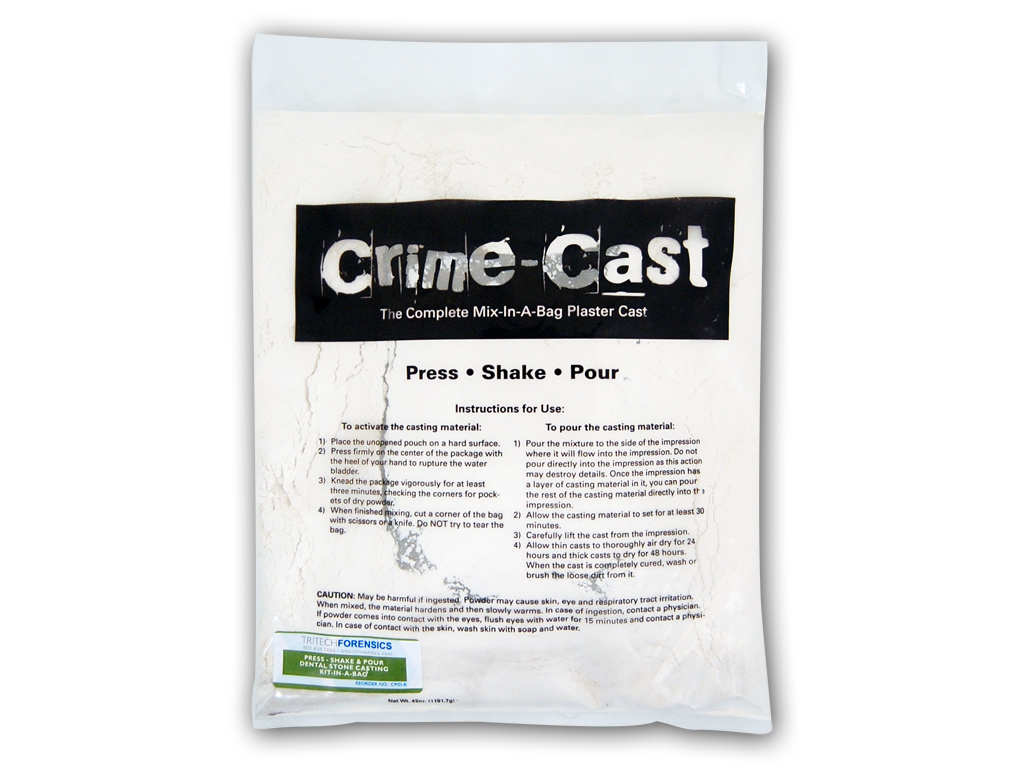
- Open the plaster packet that is included in your forensics kit, and pour into a bucket with the amount of water stated in the directions. Be careful to measure exactly - to much water and your plaster will not set, not enough and the mixture will not completely fill the print and your cast will not be useable.
- While you are waiting for the plaster to set you can start filling out the evidence collection form. Be thorough in what you write down – this could be evidence in a court of law.
- Ensure that all of fields are completed.
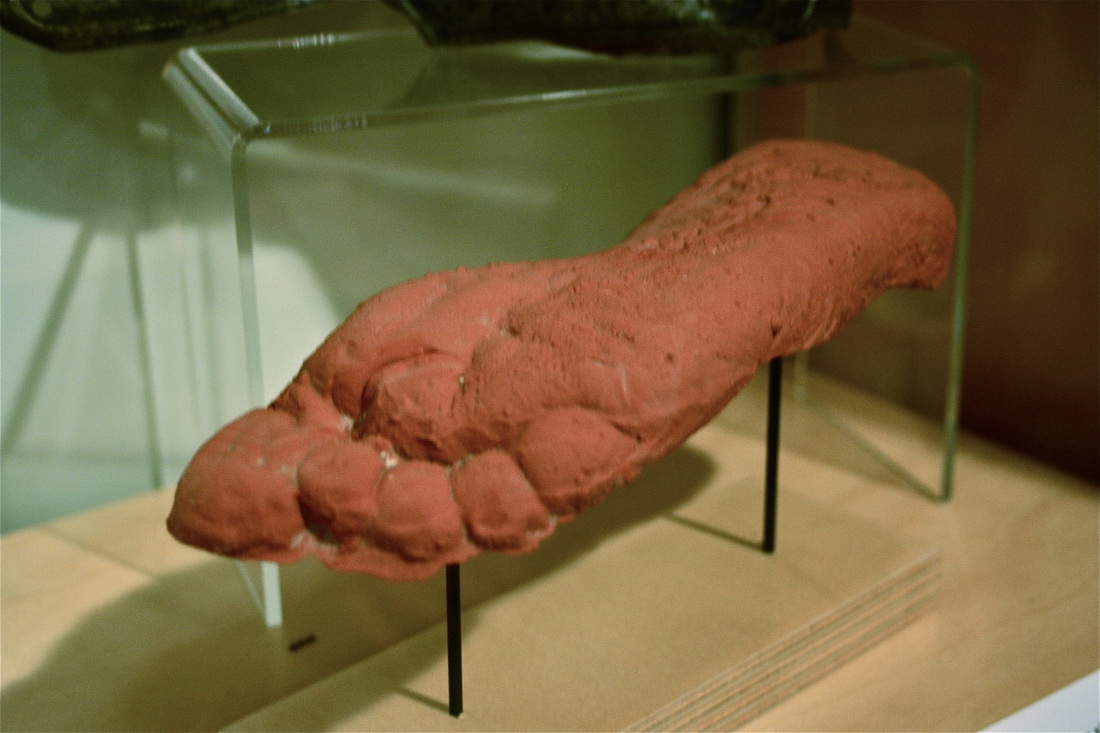
- Once the plaster is set you can carefully turn the container over and gently remove the plaster mould. Take your time and make sure that you don’t drop your plaster mould - damaged evidence cannot be used!
- Use one of the brushes from your forensics kit to remove the remaining soil, before measuring the print and recording the information on the evidence form. Take a picture of the plaster mould. Next look for any identifying features such as tread pattern, obvious cuts or wear marks, or any features of the foot such as length of toes, and add these to the evidence.
- When you and your partner are satisfied that all of the required information is included on the evidence form you can file the form in your record folder, and add an evidence tag to your plaster cast and ensure that any photographs taken are named and stored in the appropriate folders.
Be thorough as you follow each of these steps to ensure that the evidence you collect is of high quality, and you paperwork is complete.
The evidence you gather could be vital in a court case.
MATERIALS
Container for soil – shoe boxes are ideal!
Soil without any large rocks
Containers of water
Plaster
Brushes
LOCATION
A suitable outdoor area to conduct the experiment, or indoor area with non - slip easy to clean floor.
RESOURCES FROM YOUR FORENSIC KIT
Plaster mix
Brushes
Tape measure
Camera
Evidence tags
Evidence forms
CATERING FOR INCLUSION
Mark the water jugs for at the level required to correctly mix the plaster. Have the steps of the procedure carried out where students can observe their peers.
bio foam impression kit
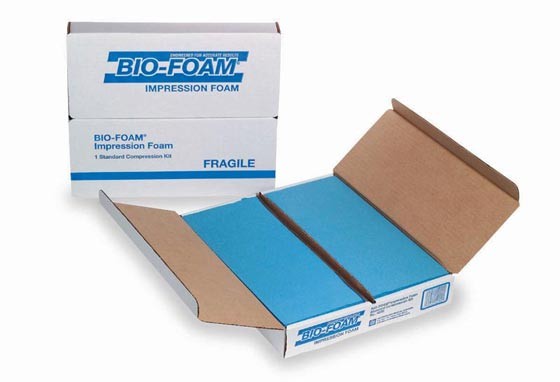
Forensic Scientist's are now using Bio-Foam to make footwear impressions without messy ink where a suspect has a shoe similar to the impression evidence left at the scene. This foam material produces a three-dimensional replica instead of the two-dimensional ink and paper method. The Bio-Foam kit comes in a cardboard container suitable for storage and will protect the impression. Ideal for quickly recording impressions of the right and left shoe and storing them in a convenient format.
tyre track impressions
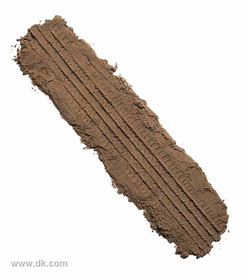
Finger prints, footprint and shoe prints are not the only prints that investigators study at crime scenes. Forensic investigations also look for the tracks of vehicle tyres. Investigators at the crime scene record deeply pressed tyre tracks first with a camera, then by pouring a liquid casting compound into the hollow of the print. This sets into a solid lump in minutes, creating a permanent record that detectives can match with a vehicle of a suspect.
